Expense cards in Odoo provide companies with a way to manage and control expenses efficiently. Odoo offers both physical and virtual cards, enabling real-time expense tracking and improved visibility into costs as they occur.
Using expense cards eliminates the need to manually create expense records, as transactions automatically generate expense entries. This streamlines the expense workflow and ensures that records are accurate and up to date.
What are Expenses in Odoo?
Expenses in Odoo are costs incurred by employees or the company that need to be tracked, approved, and reimbursed.
With Odoo Expenses, you can:
- Record and submit expenses easily
- Review and approve expenses automatically
- Process reimbursements efficiently
- Track employee and business spending in real time
Odoo Expenses streamlines the entire expense workflow. Employees log and submit expenses, which are then reviewed by management or accounting teams. Approved expenses can be reimbursed automatically, with accounting entries created seamlessly.
Expenses are fully integrated with Odoo’s Accounting and HR modules, ensuring accurate financial records and reducing manual work. Users can classify expenses, attach receipts, and maintain complete transparency.
All expense tracking and approvals use real data from submitted records, eliminating manual calculation and helping organizations maintain control over costs.
Prerequisites & Configuration
Availability
Expense Cards are available for the following countries:
| Austria | Belgium | Croatia | Estonia |
| Finland | France | Germany | Greece |
| Ireland | Italy | Latvia | Lithuania |
| Luxembourg | Malta | Netherlands | Portugal |
| Slovakia | Slovenia | Spain | |
Enable Expense Cards
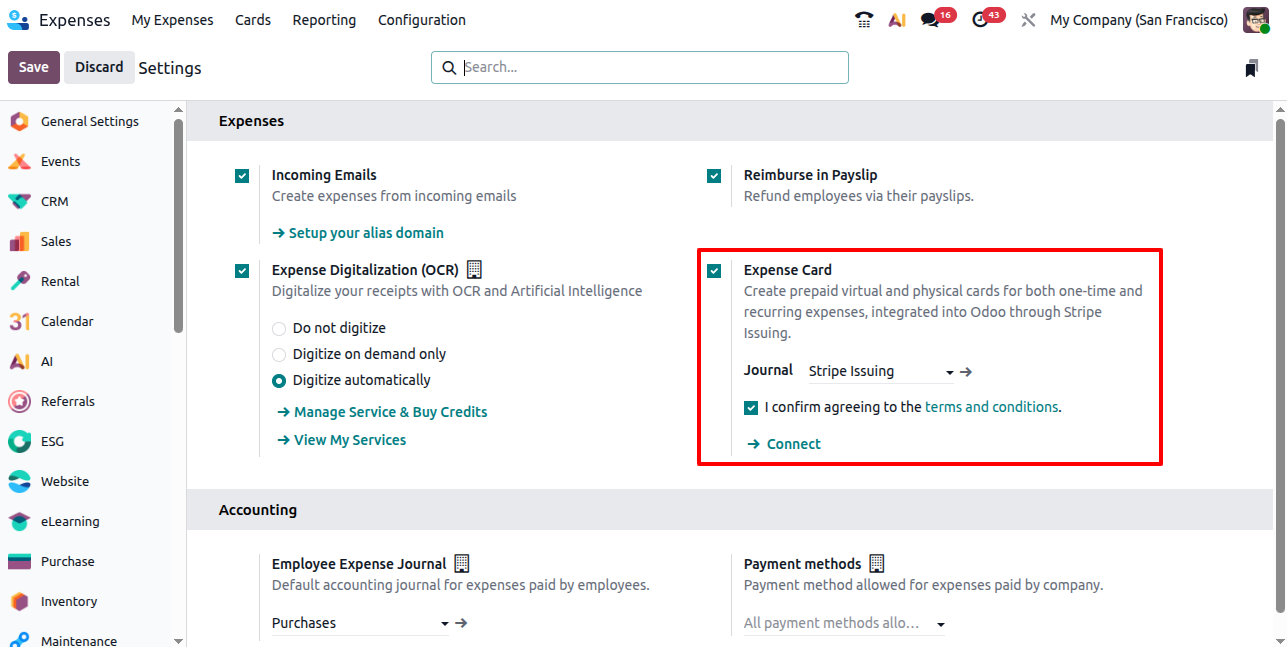
- Navigate to Expenses > Configuration > Settings
- Enable Expense Card
- Click on the terms and conditions link to go through all the terms of using Cards.
- Tick the checkbox next to “I confirm agreeing to the terms and conditions”.
- Save the Configuration
Create Stripe Connected Account
- Navigate to Expenses > Configuration > Settings
- Click Connect to create a new Stripe Issuing connect account.
- Fill in the KYC questionnaire provided by Stripe.
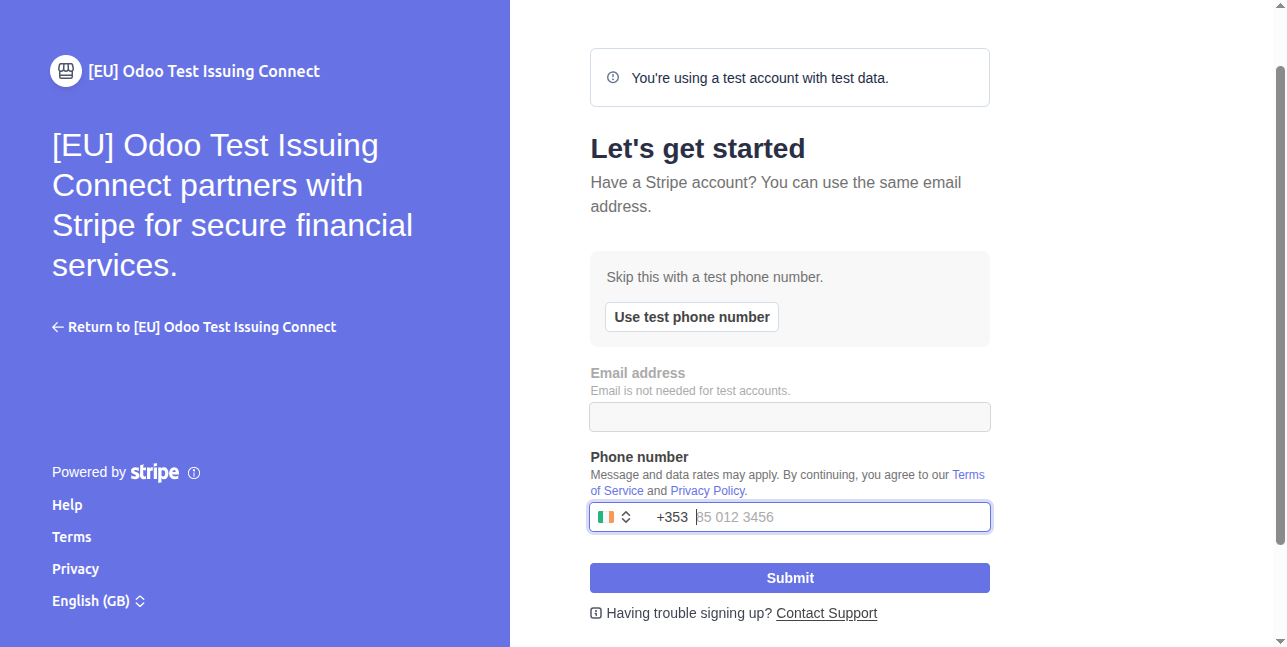
- Stripe takes up to 24 hours to approve or refuse account creation requests.
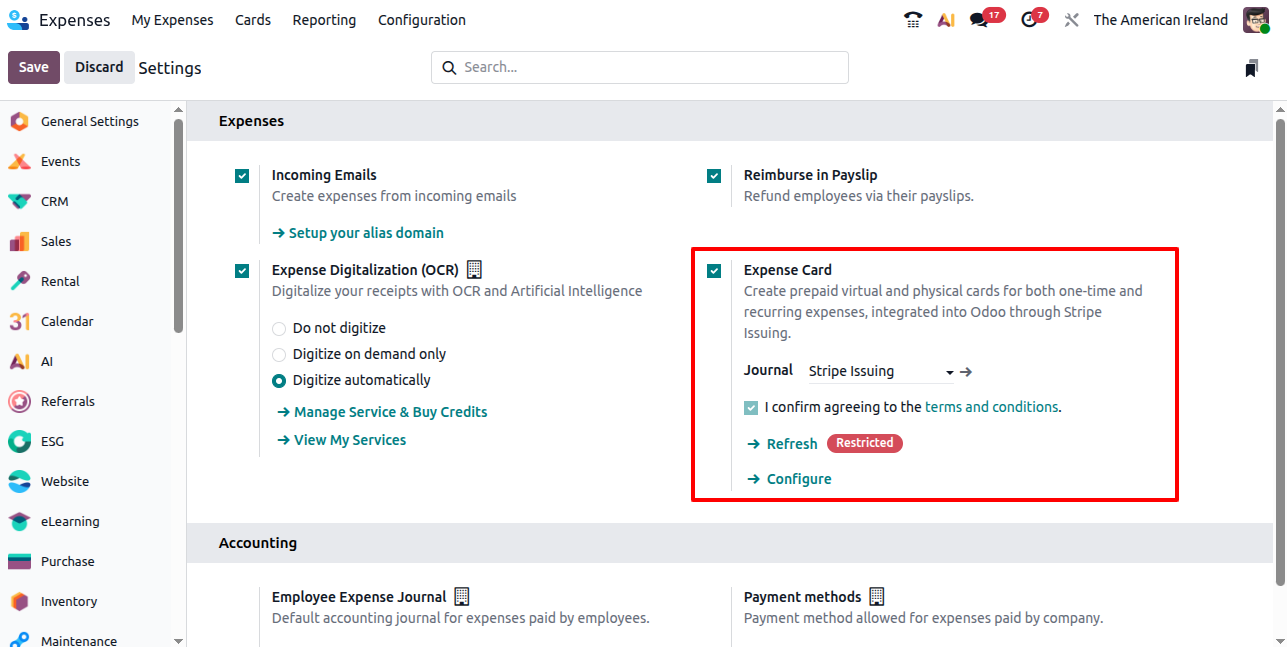
- A green Verified tag should appear next to Refresh, indicating account is properly configured.
NOTE: Since we are using a demo account, we would get a Restricted tag instead of Verified tag.
Add funds to Stripe Account
For employees to use their expense cards, funds must be available in the company’s Stripe account, to make purchases against. To add funds, follow the below steps:
- Navigate to Accounting > Dashboard > Stripe Issuing Kanban Card
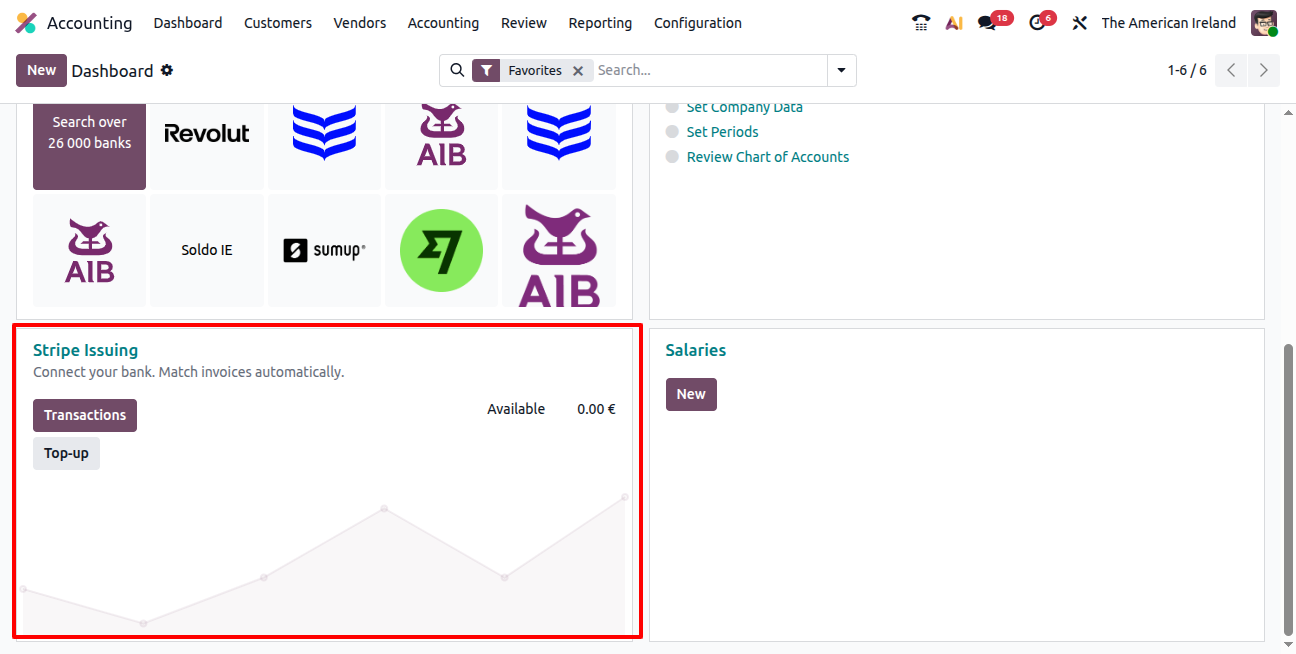
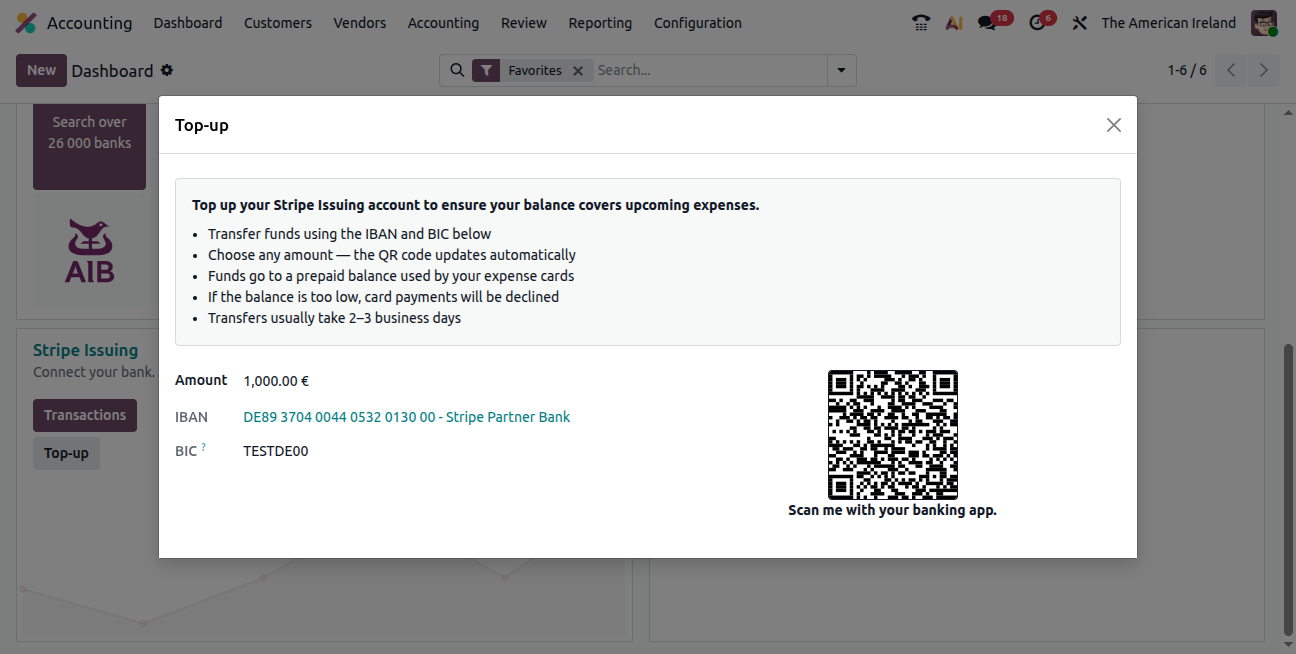
- Click “Top-up”.
- Enter the amount being transferred into the account in the “Amount” field.
- The IBAN and BIC fields would be populated based on the Stripe configuration and cannot be changed.
Configuring Expense Cards
Creating Expense Cards
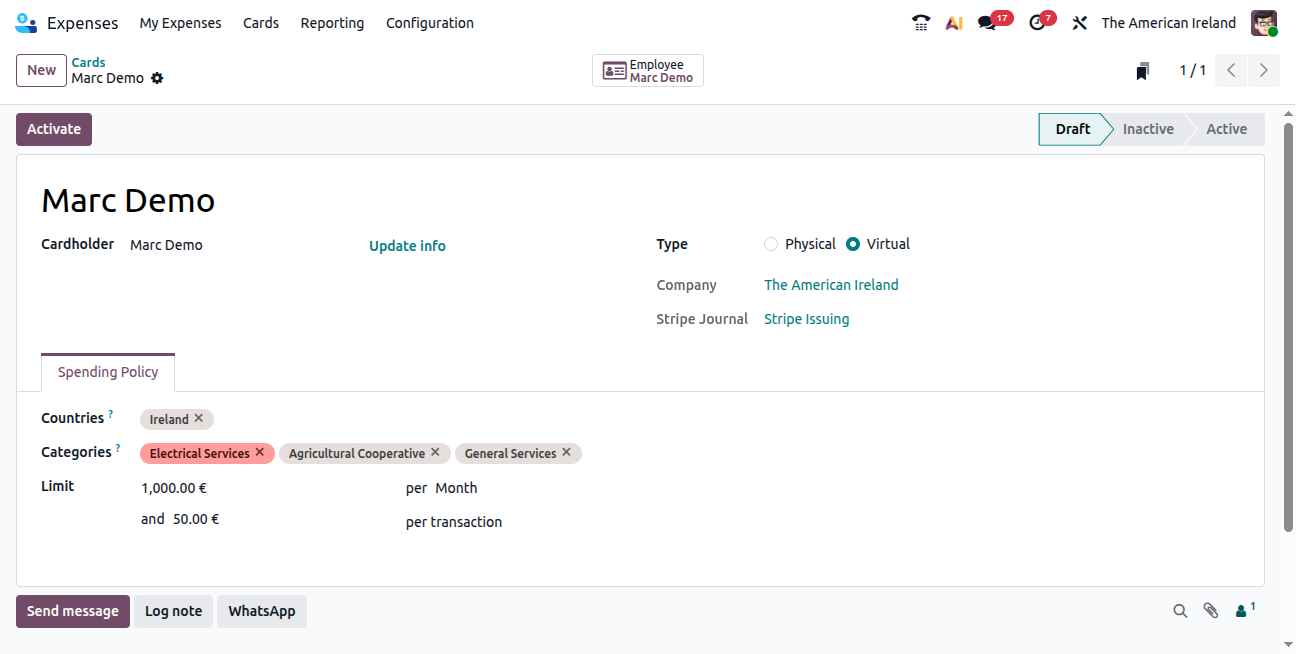
- Navigate to Expenses > Cards > New
- Enter the following details:
- Card Name (“Draft” placeholder)
- Choose Cardholder
- Type
- Delivery Address (if type is Physical)
- Company
- Configure the following fields on Spending Policy tab:
- Countries: Select the countries the card is allowed to be used in.
- Categories: Select categories if the expense card is limited to purchase items within specific categories
- Limit: Configure limits based on time periods such as per day, week, month, year as well as limits per transaction.
NOTE: If card name is not filled in, it takes the cardholder's name by default as the card name
Activating Expense Cards
- Once an expense card is created, the next step is to activate the expense card. To activate an expense card, follow the below steps:
- Navigate to Expenses > Cards > Select the card to be activated from Kanban view.
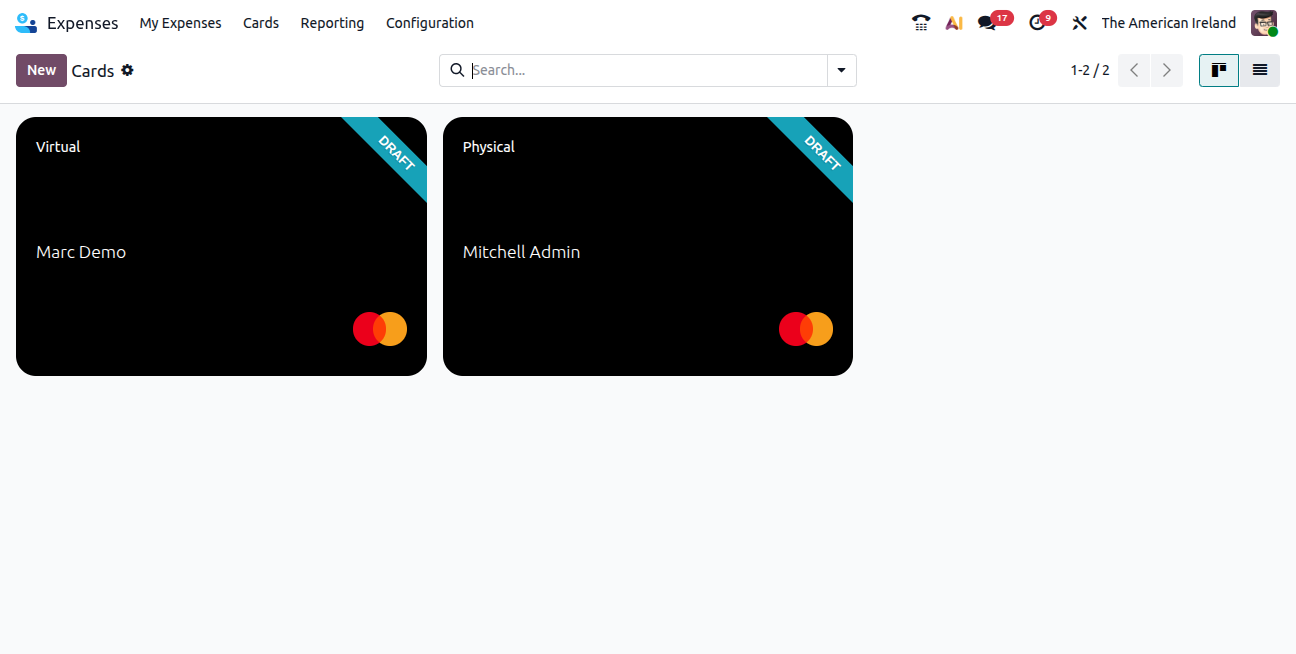
- Activate the card by clicking on:
- Activate button in case the card is virtual
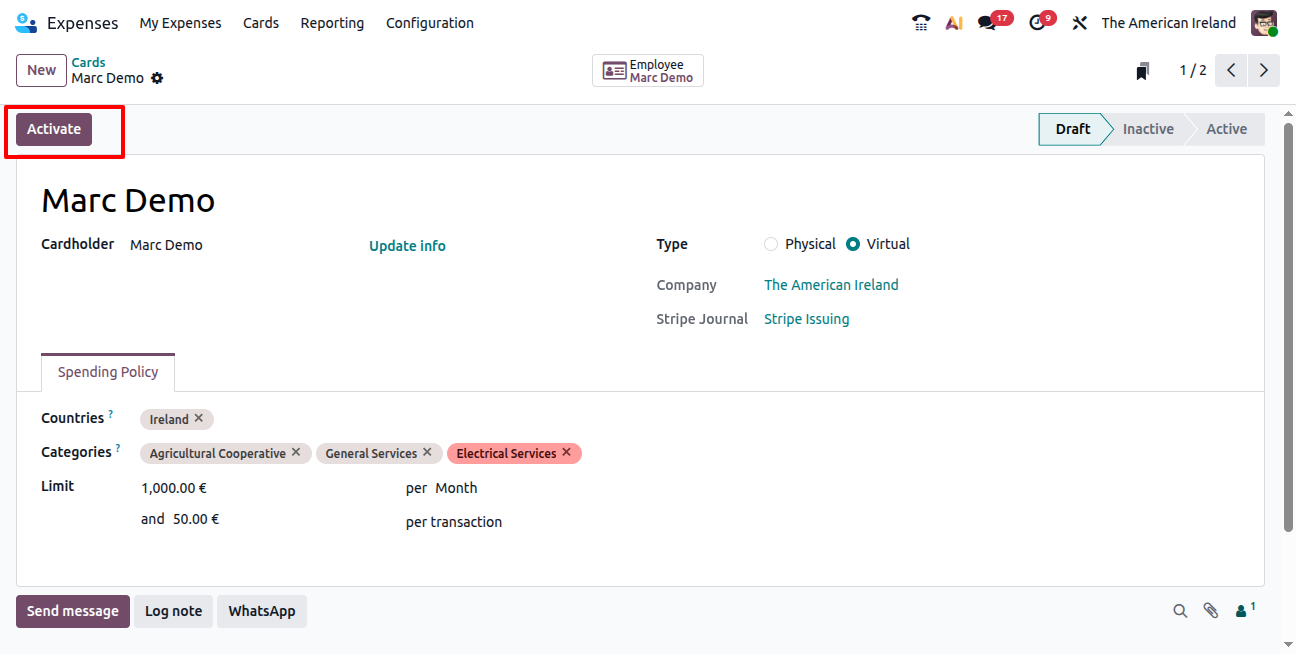
- Order button in case the card is physical
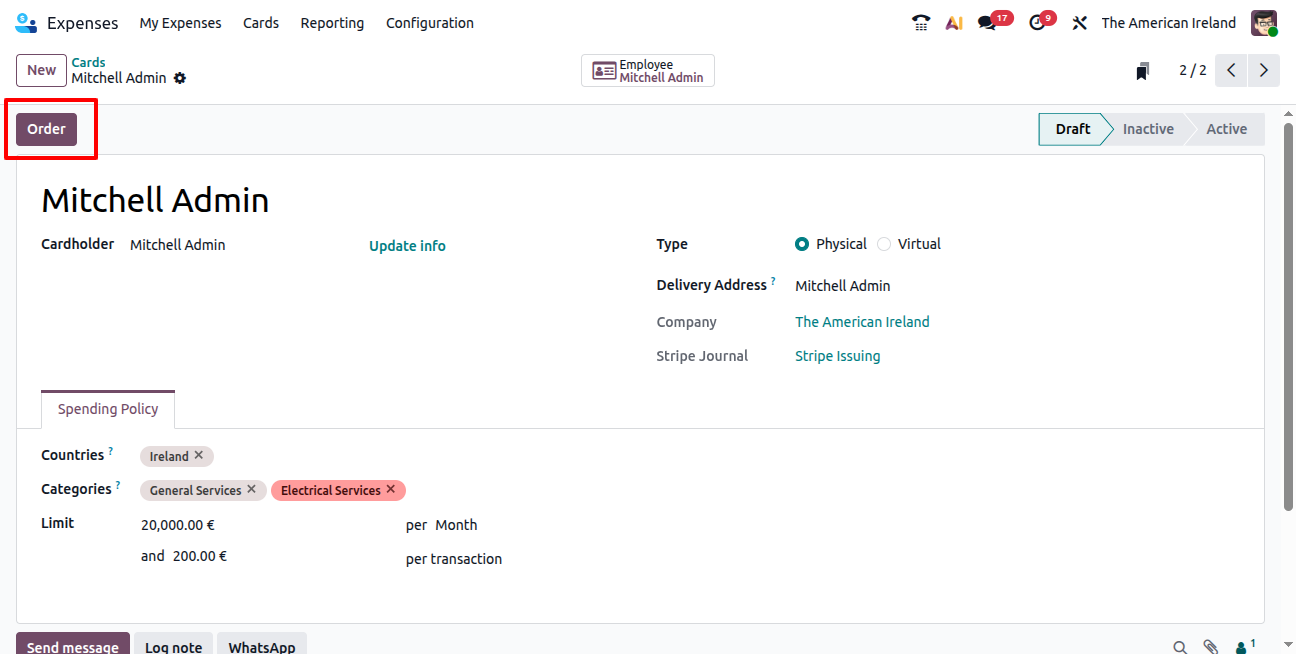
- In the case when any required details are missing from the user profile, clicking on activate card triggers a Cardholder Configuration pop-up highlighting fields that needs to be filled.
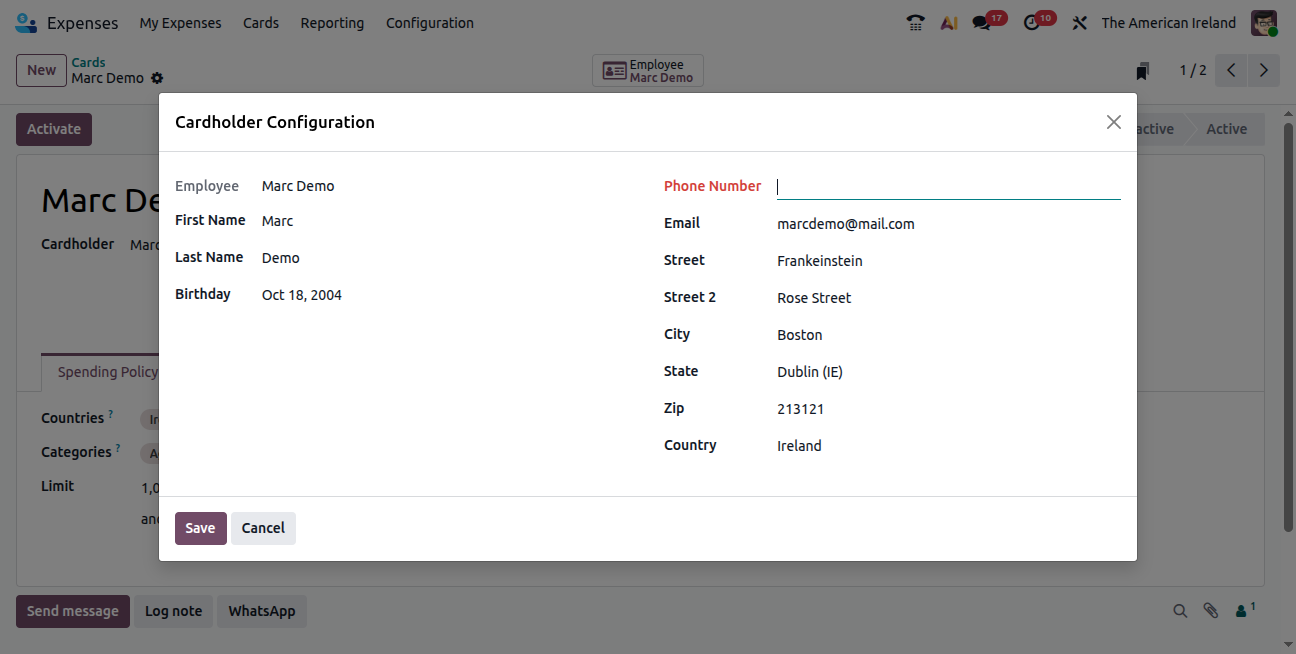
- Fill in the required fields and click on Save.
- Once the card is activated, the status of expense card changes to Active, and the user can use the card to purchase expensable items.
Conclusion
Odoo Expense Cards simplify and automate company spending by providing real-time tracking and streamlined workflows. Employees can make purchases without manual expense entry, while management maintains control over approvals and access to card information. Integration with Stripe ensures secure funding and transactions, and all expenses are automatically recorded for accurate accounting. Overall, expense cards enhance visibility, reduce administrative work, and give organizations better control over employee and business spending.
FAQ
Are Expense Cards enabled by default in Odoo 19?
No, Expense Card must be enabled from Expenses settings.
Is the Expense Card feature available to everyone?
No, the Expense Card feature is available only in a select list of countries.
Does the use of Expense Card require any external account setup?
Yes, a Stripe Issuing Connect account must be created.
Any app other than Expenses is required for use of Expense Cards feature?
Yes, the Accounting and Invoicing apps must be installed to use the Expense Cards feature
Is there any extra fee for creating expense cards?
No, Odoo covers all fees associated with creating virtual and physical expense cards.
Are there any terms and conditions to be agreed to use Expense Cards?
Yes, terms and conditions must be agreed to before using expense cards.